Building an Ember app with Ember Appkit Rails - Part 4 Conclusion
This is the conclusion to a 4 part series on creating a simple Ember application using Ember Appkit Rails
In part3, we set our application home page to render the books’ resource index.
You can find the source code for this app at Github.
To finish off our app, let’s clean up some of UI for a more polished look.
Remove headers from some of our templates:
app/templates/application.hbs
{{outlet}}app/templates/books.hbs
{{outlet}}app/templates/books/index.hbs
<p>{{link-to 'New book' 'books.new'}}</p>

  <table>
    <tr>
      <th>id</th>
      <th>Title</th>
      <th>Author</th>
      <th>Url</th>
    </tr>
    {{#each}}
      <tr>
        <td>{{link-to id 'books.show' this}}</td>
        <td>{{title}}</td>
        <td>{{author}}</td>
        <td>{{url}}</td>
      </tr>

  </table>
Add a navigation bar:
app/templates/application.hbs
<nav class="top-bar" data-topbar>
    <ul class="title-area">
      <li class="name">
        <h1><a href="/">Books</a></h1>
      </li>
    </ul>

    <section class="top-bar-section">
      <ul class="right">
        <li class="active">
          {{#link-to 'books.new' classNames="button"}}Add New Book{{/link-to}}
        </li>
      </ul>
    </section>
  </nav>
Update UI for crud actions:
app/templates/books/form.hbs
<form>
    <div class="row">
      <div class="large-4 columns">
          {{input value=title placeholder="Enter a Title"}}
      </div>
    </div>
    <div class="row">
      <div class="large-4 columns">
          {{input value=author placeholder="Enter an Author Name"}}
      </div>
    </div>
    <div class="row">
      <div class="large-4 columns">
          {{input value=url placeholder="Enter an URL"}}
      </div>
    </div>
    <div class="row">
      <div class="large-4 columns">
        <button type="submit" class="tiny button"  {{action save this}}>
          Save
        </button>
        <button type="submit" class="tiny button"  {{action cancel this}}>
          Cancel
        </button>
      </div>
    </div>
  </form>
app/templates/books/index.hbs
<div class="row">
  <table>
    <tr>
      <th>Title</th>
      <th>Author</th>
    </tr>
    {{#each}}
      <tr>
        <td><a target="_blank" href="">{{title}}</a></td>
        <td>{{author}}</td>
      </tr>
    {{/each}}
  </table>
</div>
app/templates/books/new.hbs
<div class="row">
    <h3>Add New Book</h3>
  </div>

  {{partial 'books/form'}}
app/templates/books/show.hbs
<div class="row">
    <ul>
      <li>Title: {{title}} {{link-to 'Edit' 'books.edit' this}}</li>
      <li>Author: {{author}} {{link-to 'Edit' 'books.edit' this}}</li>
      <li>Url: {{url}} {{link-to 'Edit' 'books.edit' this}}</li>
    </ul>
  </div>

  <div class="row">
    <button class="tiny button" {{action destroyRecord this}}>Delete</button>
  </div>
Add the following file:
app/assets/stylesheets/index.css
.top-bar {
padding: 0px 115px;
}
.row h3 {
margin-left: 15px;
}
.row table {
width: 63em;
}
.row table th {
text-align: left;
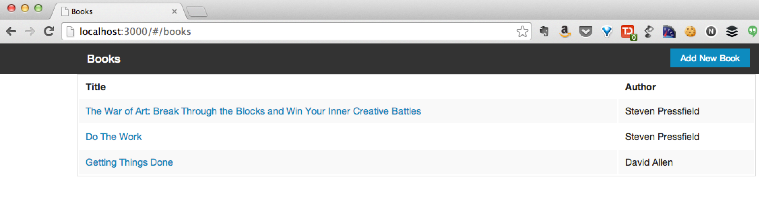
}Following those changes, the application loaded in your browser should look similar to this screenshot:
The books application that we ended with is very simple. There are a few things that the application could benefit from that might be good tasks to take on independently to level up your Ember knowledge. Some things that the app could probably benefit from include: * authentication * paging * form validation
Good luck in your journey learning Ember. Be sure to come back to see posts on other Ember topics.